01. Submitting Your Project
Unscented Kalman Filter Highway Project
Tracking multiple cars on the highway using UKF.
Below is a workspace with the SFND_Unscented_Kalman project repository cloned over. In this project you will be filling in the function code for
ukf.cpp
and
ukf.h
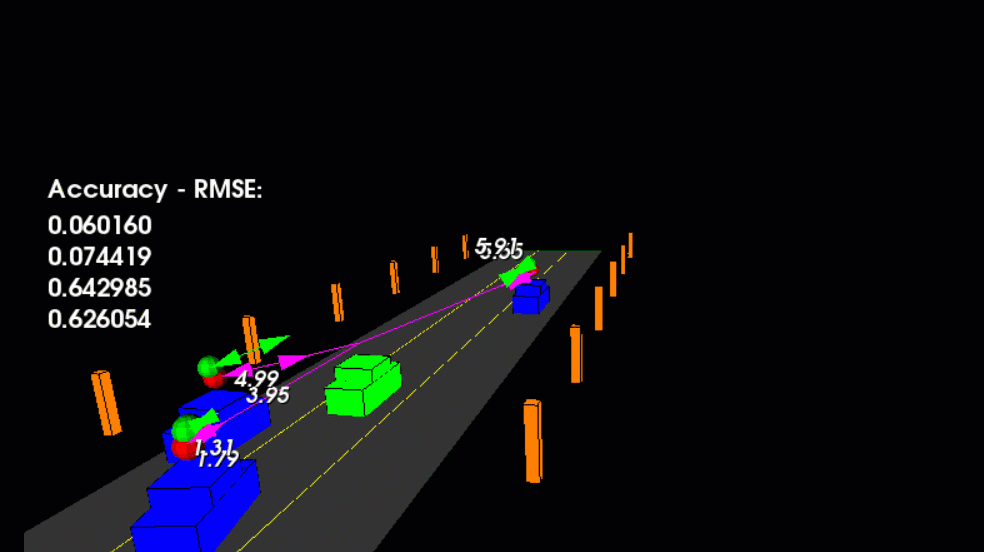
by using the previous lessons as reference. The results of completing the UKF code can be seen in the animation above, where each of the three traffic cars are tracked using a CTRV motion model. Although the cars have variable acceleration and turning rates the UKF is still able to track the objects quite well with the CTRV model. The accuracy is being calculated by the RMSE, root mean squared error over each time step and for each car. The RMSE is looking at the error difference between the ground truth and estimated position and velocities. All the cars are considered in the RMSE value so if one car is particularly inaccurate it would affect the overall RMSE in this case. In the animation above the 4 RMSE values are X, Y, Vx, Vy from top to bottom. To pass the project the RMSE values should not exceed the rmse threshold values in the project rubric after the simulator has ran for more than 1 second.
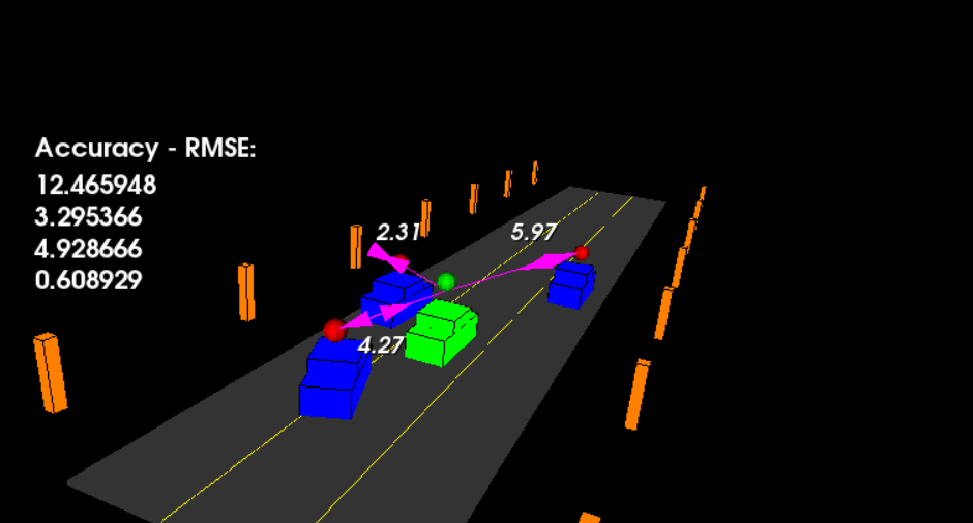
cars without tracking, lidar pings are red spheres and radar is purple lines.
main.cpp
is using
highway.h
to create a straight 3 lane highway environment with 3 traffic cars and the main ego car at the center. The viewer scene is centered around the ego car and the coordinate system is relative to the ego car as well. The ego car is green while the other traffic cars are blue. The traffic cars will be accelerating and altering their steering to change lanes. Each of the traffic car's has it's own UKF object generated for it in
highway.h
, and will update each individual one during every time step.
The red spheres above cars represent the (x,y) lidar detection and the purple lines show the radar measurements with the velocity magnitude along the detected angle. The Z axis is not taken into account for tracking, so you are only tracking along the X/Y axis.
Working on the Project Locally
The Github repository can be used to clone over the project locally instead of working on it in the work space. In that situation a zip file containing the root of the compiled project would be uploaded and submitted directly.
Testing Your Project Before Submission
Before you submit the project, compile and run the project once more to ensure that everything is working correctly. You should see results that are similar to the .gif above: each of the three vehicles should be tracked with green spheres indicating estimated position and green magnitude arrows showing estimated velocity value and direction. The RMSE values should also look reasonable.
Checking the Rubric
If your project works correctly and you are happy with the results, carefully look at the project rubric . If you feel like all the criteria from the rubric are met, you are ready to submit!
Submitting the Project
You can submit your project using the "SUBMIT PROJECT" button in the terminal below. If you are developing the project locally, and you would prefer to submit using a .zip file or Github repo, proceed to the next concept.
Workspace
This section contains either a workspace (it can be a Jupyter Notebook workspace or an online code editor work space, etc.) and it cannot be automatically downloaded to be generated here. Please access the classroom with your account and manually download the workspace to your local machine. Note that for some courses, Udacity upload the workspace files onto https://github.com/udacity , so you may be able to download them there.
Workspace Information:
- Default file path:
- Workspace type: react
- Opened files (when workspace is loaded): n/a